
Are you looking to enhance your videos with custom sound effects? Imagine combining serene visuals with a perfectly synchronized soundtrack. In this blog post, we’ll teach you how to seamlessly add sound effects to any video using FFmpeg. Additionally, we’ll cover how to handle cases where the video is shorter than the audio by looping the video to match the audio’s duration. This educational guide is perfect for video editors, content creators, and anyone curious about video processing.
- Why Use FFmpeg for Video Editing?
- What We’ll Do in This Tutorial
- Step-by-Step Guide: Adding Sound Effects to Any Video Using FFmpeg
- Step 1: Install FFmpeg
- Step 2: Upload Your Files
- Step 3: Calculate Audio Duration
- Step 4: Loop the Video to Match Audio Duration
- Step 5: Combine the Video and Audio
- Step 6: Download and Showcase Your Final Video
- Understanding the Code
- Why This Method Is Perfect for Content Creators
Why Use FFmpeg for Video Editing?
FFmpeg is a powerful open-source tool that allows you to process multimedia files effortlessly. From trimming and merging to adding sound effects, FFmpeg can handle it all. Using it in Google Colab gives you access to a robust computational environment without requiring a high-performance local machine. Plus, it’s completely free to use!
What We’ll Do in This Tutorial
We’ll upload:
- A short video file (e.g., a 10-second clip of a calm fireplace scene).
- A sound effect file (e.g., a 1:30-minute rain sound).
Then, we will:
- Loop the video to match the sound effect’s duration if necessary.
- Merge the video and audio seamlessly to create a professional output.
- Download the final file.
Let’s dive in!
Step-by-Step Guide: Adding Sound Effects to Any Video Using FFmpeg
Here’s the Python script you’ll use in Google Colab. Follow these steps to get started.
Step 1: Install FFmpeg
Google Colab doesn’t include FFmpeg by default, so we’ll need to install it first:
!apt-get install -y ffmpeg
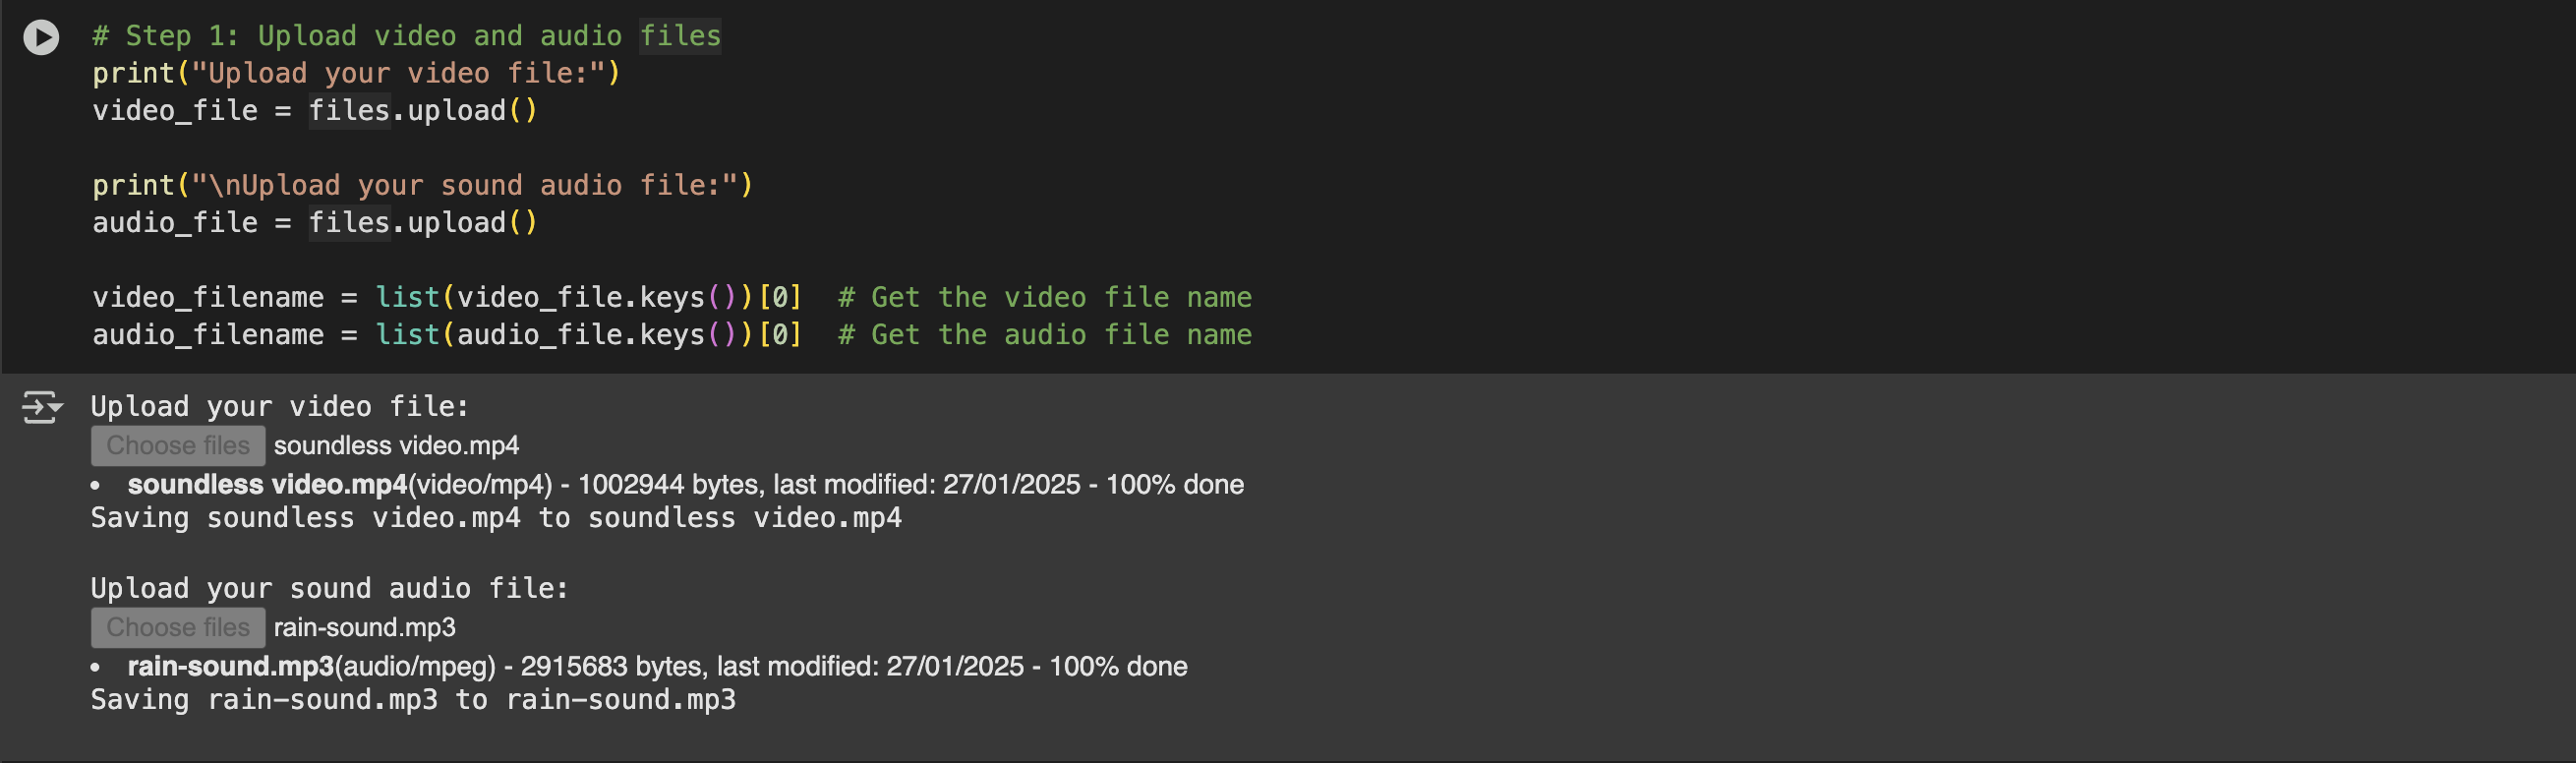
Step 2: Upload Your Files
We’ll upload both the video and the audio files. The video can be shorter than the audio, as we’ll loop it to match the audio’s length.
from google.colab import files

# Upload video file
print("Upload your video file:")
video_file = files.upload()

# Upload audio file
print("Upload your sound effect file:")
audio_file = files.upload()

video_filename = list(video_file.keys())[0] # Get the video file name
audio_filename = list(audio_file.keys())[0] # Get the audio file name
Step 3: Calculate Audio Duration
We’ll calculate the duration of the audio file using FFprobe, a tool included with FFmpeg.
import subprocess

def get_audio_duration(audio_file):
    result = subprocess.run(
           ['ffprobe', '-i', audio_file, '-show_entries', 'format=duration', '-v', 'quiet', '-of', 'csv=p=0'],
           stdout=subprocess.PIPE,
           stderr=subprocess.PIPE
    )
    return float(result.stdout.decode().strip())

audio_duration = get_audio_duration(audio_filename)
print(f"Audio duration: {audio_duration} seconds")
Here we used subprocess.run() to execute the ffprobe command, which extracts the duration of an audio file. The output is decoded from bytes to a string, stripped of extra spaces, and converted to a float representing the duration in seconds. The function returns this value, which is then printed.
Step 4: Loop the Video to Match Audio Duration
If the video is shorter than the audio, we’ll loop it using FFmpeg until it matches the audio’s length.
looped_video = "looped_video.mp4"
!ffmpeg -stream_loop -1 -i "{video_filename}" -t {audio_duration} -c copy -an "{looped_video}"
here we used FFmpeg to create a looped video that matches the duration of the audio. It takes the input video (video_filename), loops it indefinitely with -stream_loop -1, and sets the duration to match the audio length (audio_duration). The -c copy option copies the video stream without re-encoding, making the process faster, and -an disables audio from the video.
Step 5: Combine the Video and Audio
Now, we’ll merge the looped video and sound effect into one cohesive output file. The -shortest flag ensures the output ends when the shorter track (in this case, the video or audio) finishes.
output_file = "output_video_with_sound.mp4"
!ffmpeg -i "{looped_video}" -i "{audio_filename}" -c:v copy -c:a aac -shortest "{output_file}"
Step 6: Download and Showcase Your Final Video
Finally, we’ll provide a download link for your completed video and display it directly in the Colab notebook.
from google.colab import files

# Download the video
files.download(output_file)

# Display the video in the notebook
from IPython.display import HTML

HTML(f"<video width='640' height='360' controls><source src='{output_file}' type='video/mp4'></video>")
Understanding the Code
- FFmpeg Commands:
-stream_loop -1: Loops the video indefinitely.-t {audio_duration}: Specifies the exact duration for the looped video.-shortest: Ensures the output video stops when the shorter track (audio or video) ends.
- Python Integration: By running FFmpeg commands within Python, you’re able to automate the video editing process seamlessly.
- Google Colab Advantage: Using Colab ensures you don’t need high-end hardware locally, and it’s easy to share your work or collaborate.
Why This Method Is Perfect for Content Creators
If you create videos for platforms like YouTube, Instagram, or TikTok, this method is a game-changer. Instead of relying on costly software, you can achieve professional-quality results with just Python and FFmpeg. Plus, customizing your projects in Colab makes it easy to experiment and tweak.
By following this tutorial, you can easily add sound effects to your videos and create a perfect match between visuals and audio. Whether it’s for personal projects, educational purposes, or social media content, the result will captivate your audience. Ready to give it a try? Head over to Google Colab, upload your files, and start creating your masterpiece today!
If you found this tutorial helpful, don’t forget to share it with fellow content creators and leave a comment below with your results. Happy editing! 😊

Rupendra Choudhary is a passionate AI Engineer who transforms complex data into actionable solutions. With expertise in machine learning, deep learning, and natural language processing, he builds systems that automate processes, uncover insights, and enhance user experiences, solving real-world problems and helping companies harness the power of AI.