This post is a step-by-step guide to get Dialogflow API credentials for setting up authentication to send query messages and retrieve intents information using HTTP requests.
Step 1 – Google Project ID
When you create a Dialogflow agent, a Google Project is created automatically or you can choose an existing Google project. Along with this Google Project, a Google Service account is also created which has all permissions to communicate with the Dialogflow.
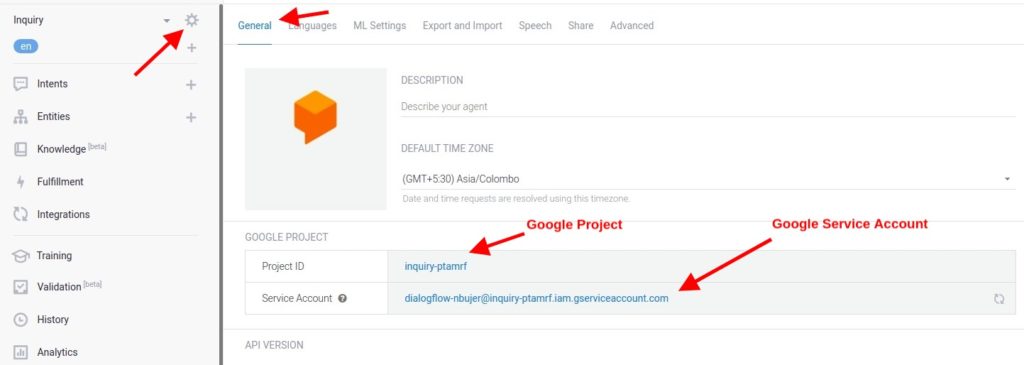
Log in to your Dialogflow account and select your agent. Then click on Gear Icon next to your agent name and copy Project ID as shown below:
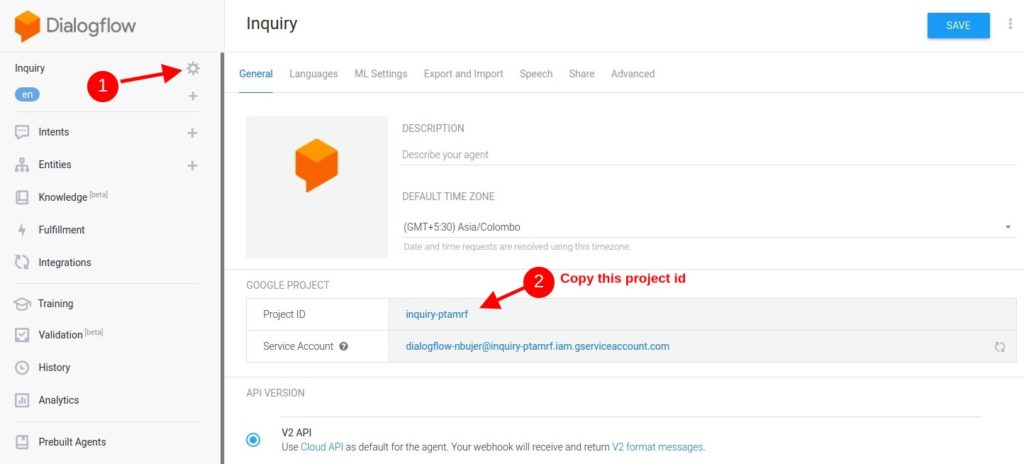
Step 2 – Create Service Account
We need to add one more google service account to get Dialogflow Client access permission to access the Dialogflow API.
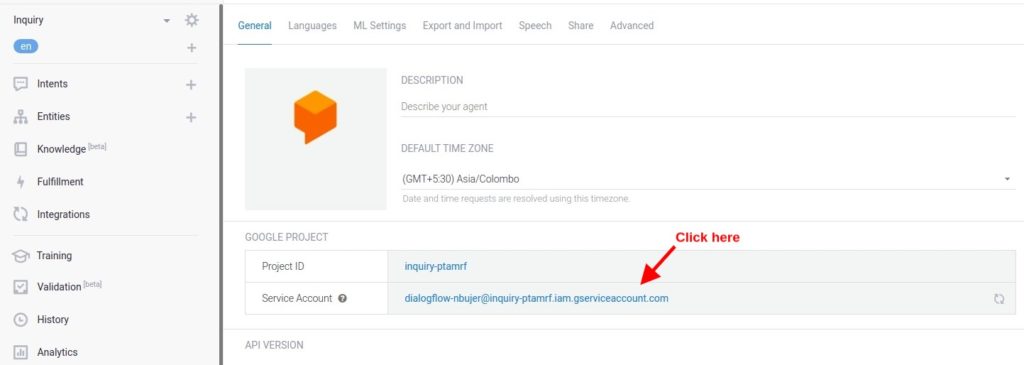
Click on the Service Account name and you’ll be redirected to the Service Account page of your google project.
Click on Create Service Account link at the top menu and you see a Service account details page in the first step.
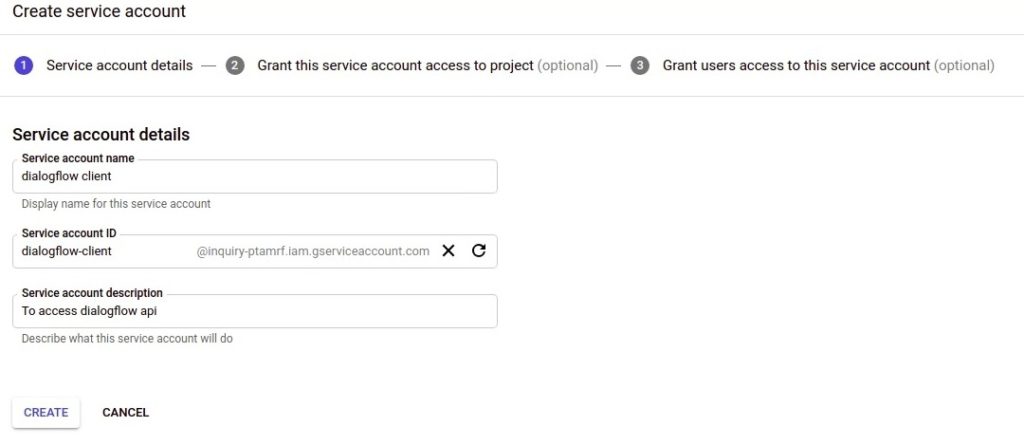
Enter here service account name and service description and click on Create button. On the next page, you’ll see Service account permissions settings.
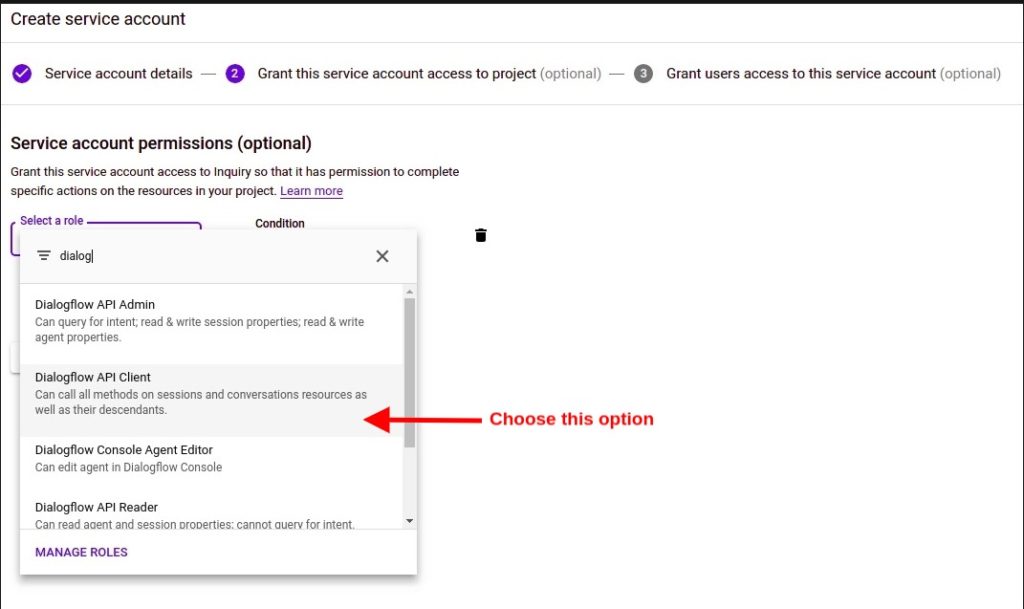
Select Dialogflow API Client role and click on the Continue button. The next page is to grant users access to the service account you just created.
You may leave Google Users Role and Admins Role to empty and Click on the Create Key button and choose JSON in the Key type option.
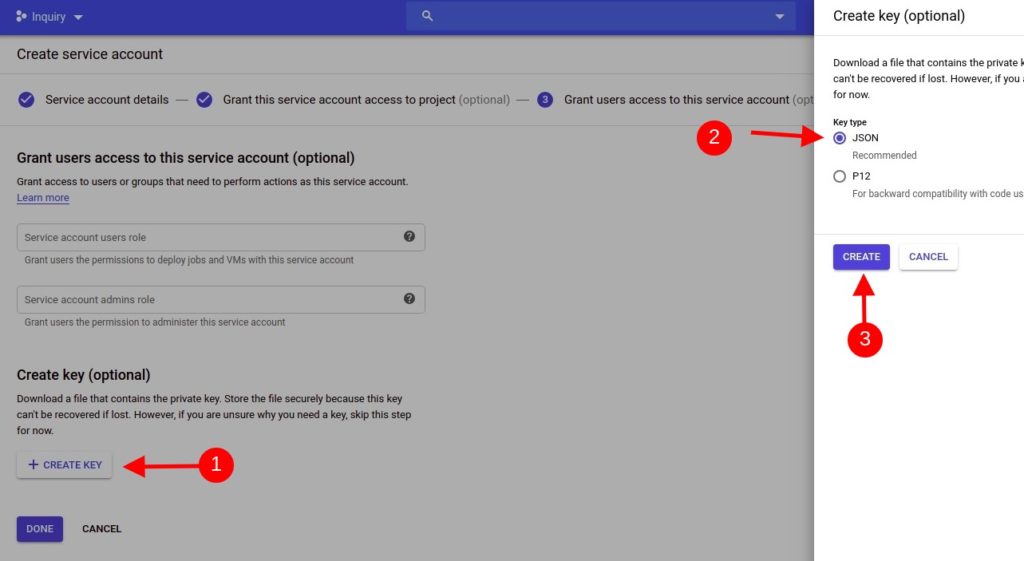
And click on the Create button. This will allow you to download a JSON file which consists of private keys so keep it at a safe place and don’t share it publicly.
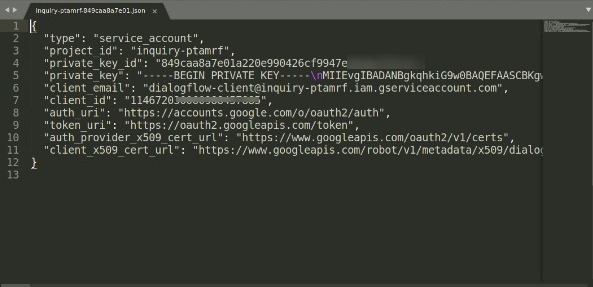
Open the JSON file and you see here all required information we need for the authentication. You can get Project ID from this file as well. Most of the time you need Client Email and Private Key to use in your API project.

Sandeep Kumar is the Founder & CEO of Aitude, a leading AI tools, research, and tutorial platform dedicated to empowering learners, researchers, and innovators. Under his leadership, Aitude has become a go-to resource for those seeking the latest in artificial intelligence, machine learning, computer vision, and development strategies.


